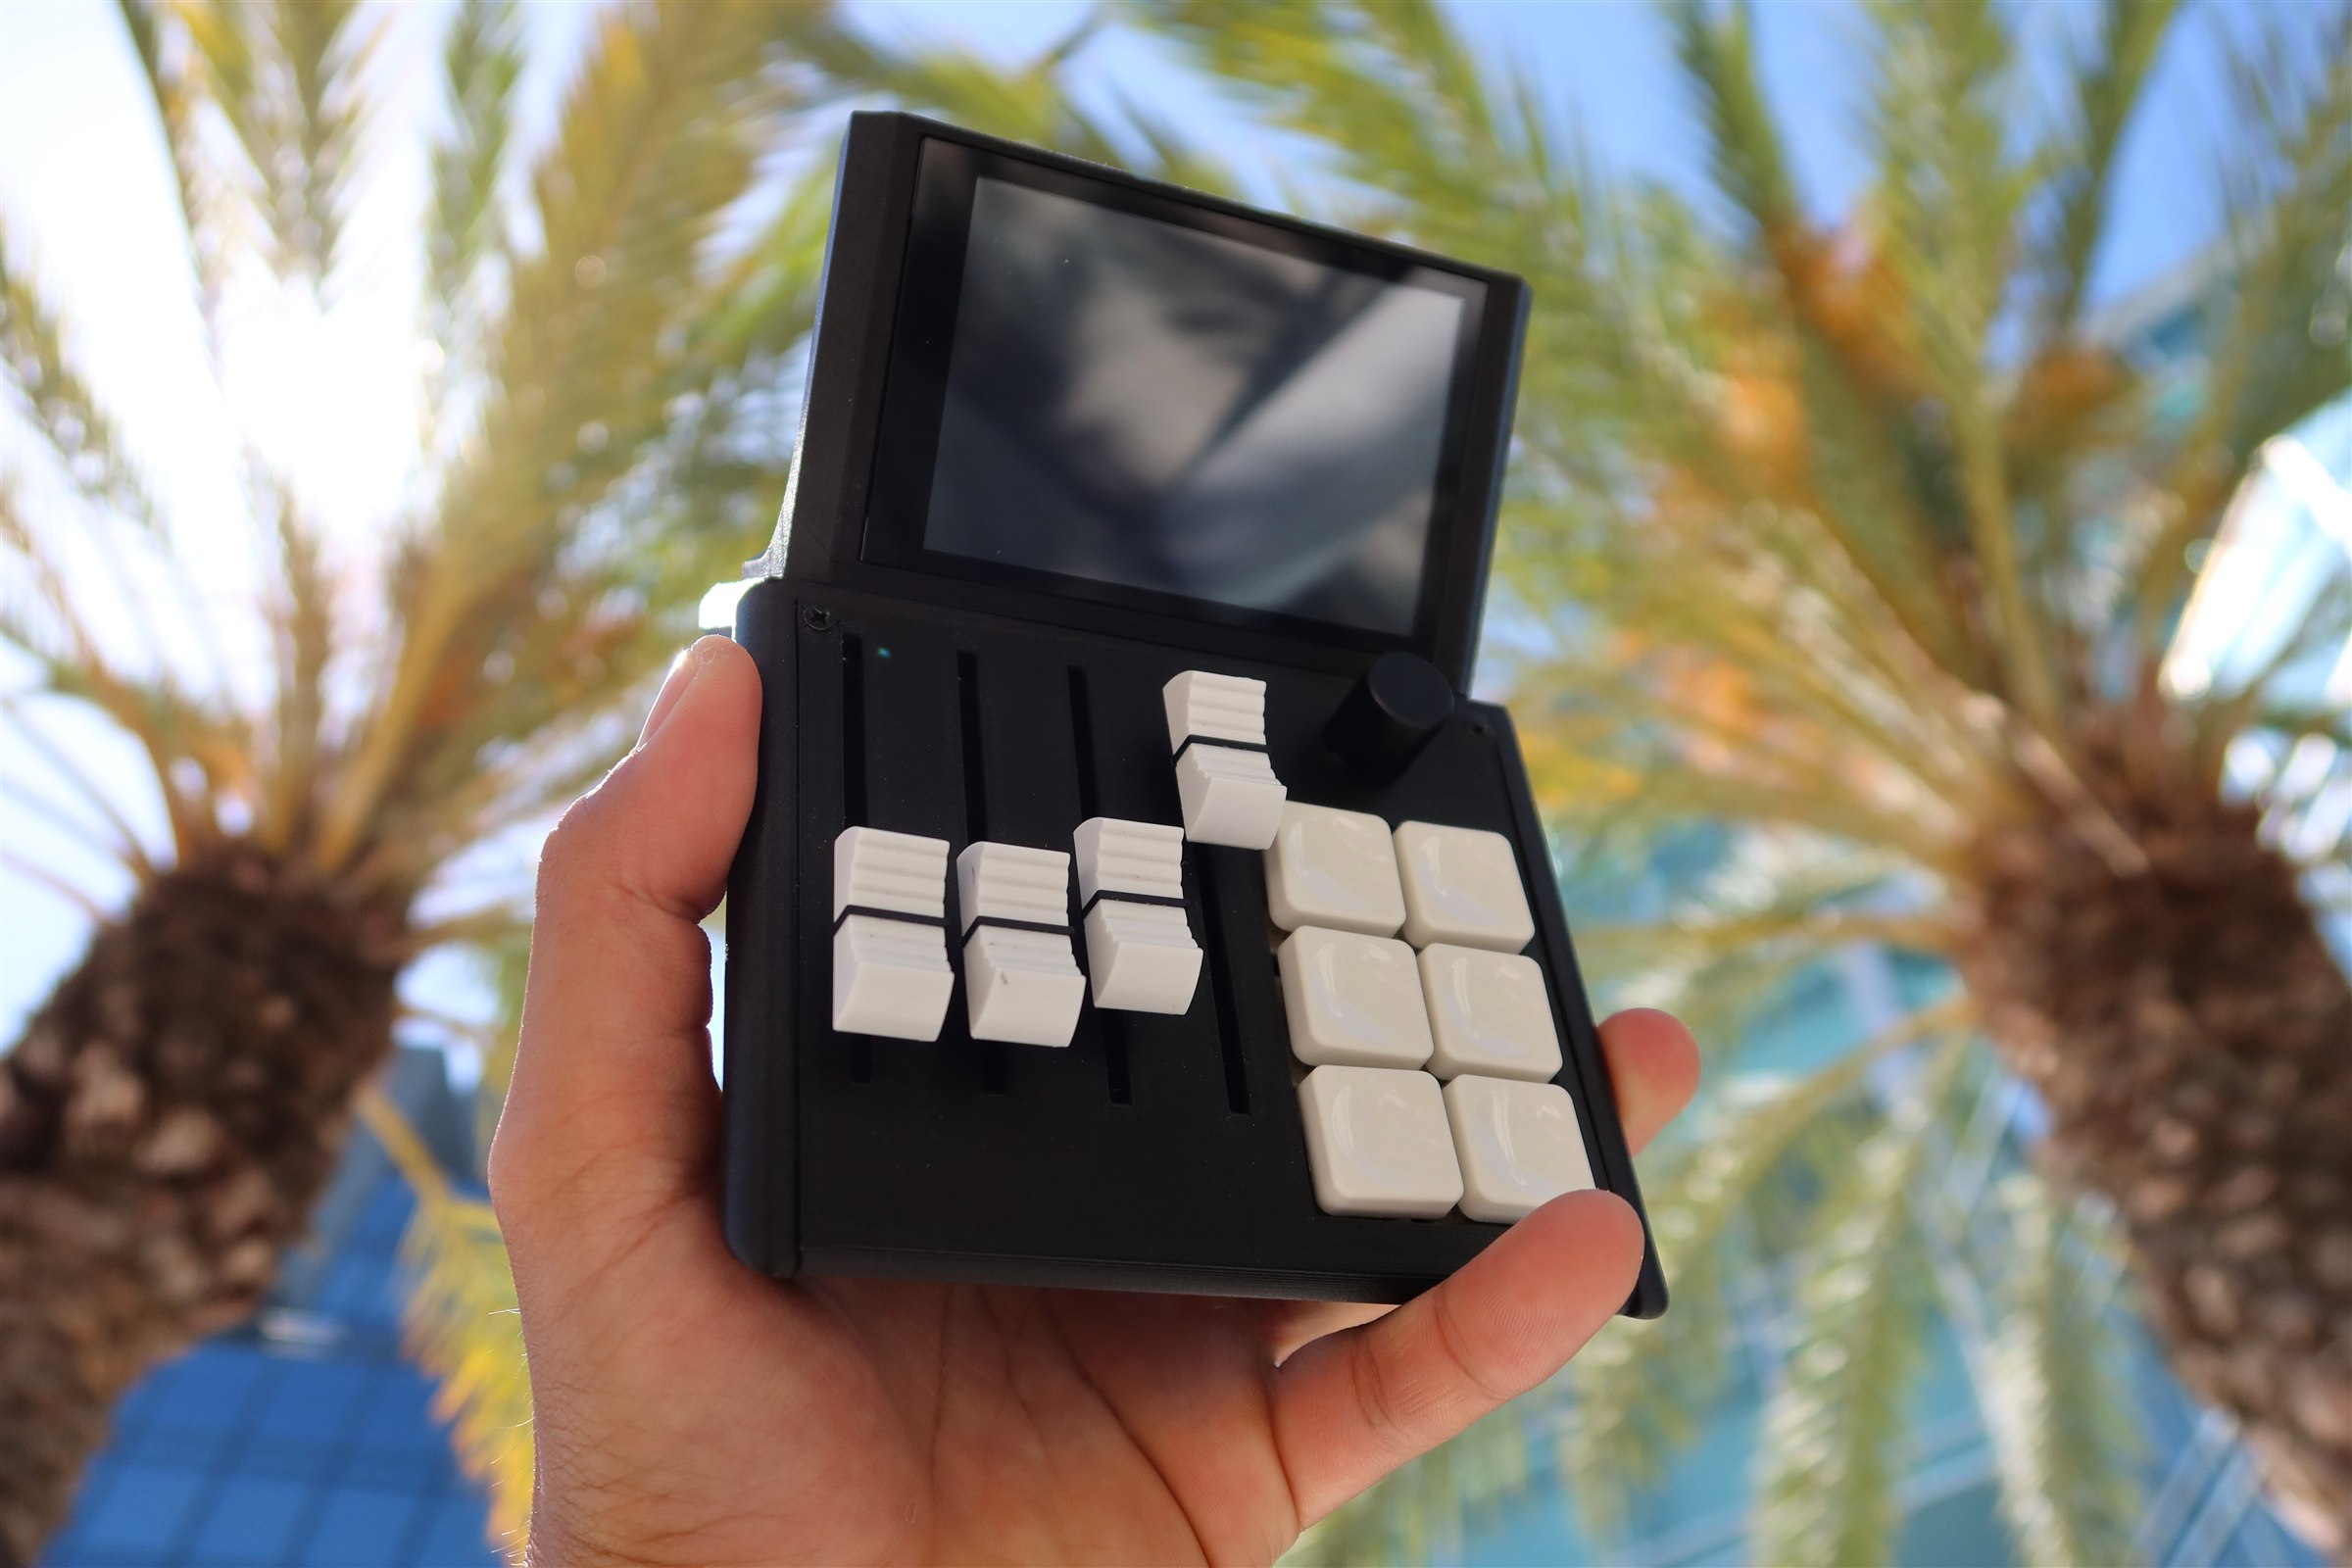
Set up MIDI on your Mixlar M1X using Mixlar Control.
Step 1
Install Mixlar Control
The desktop app handles all MIDI configuration for the Mix.
1
Download the app
Go to mixlar.net/download and grab the latest version of Mixlar Control for your operating system.
2
Install and launch
Run the installer and open Mixlar Control. It will start scanning for your device automatically.
Step 2
Connect your Mix
Plug in via USB-C or pair over Bluetooth.
3
Connect via USB-C
Plug the included USB-C cable into your Mixlar M1X and your computer. The device powers on and the display lights up. Mixlar Control detects it automatically.
4
Or pair via Bluetooth
Press and hold the pairing button on the back of the Mix for 3 seconds. Open your system's Bluetooth settings and select "Mixlar M1X" from the device list.
USB recommended for MIDI. USB provides the lowest latency and most reliable MIDI connection. Use Bluetooth for casual control or when cable-free is important.
Step 3
Enable MIDI mode
Switch the Mix from audio control to MIDI controller mode.
5
Open device settings
In Mixlar Control, click the gear icon next to your connected device to open its settings panel.
6
Switch to MIDI mode
Under Device Mode, select MIDI. The Mix will reconfigure itself — the sliders and knobs now send MIDI messages instead of controlling system audio.
Hybrid mode: You can also use Hybrid mode, which sends MIDI while still controlling your system audio. Great for producers who want both.
Step 4
Configure MIDI mappings
Assign CC numbers, channels, and behaviors to each control.
7
Map your sliders and knobs
In Mixlar Control, click on any slider or knob to configure its CC number, MIDI channel, and value range. Changes apply instantly.
8
Map your buttons
Click any button to set it up as a MIDI Note or CC toggle. Choose between momentary (press and release) or toggle (press on, press off) behavior.
Step 5
Set up your DAW
Enable the Mix as a MIDI input in your music software.
9
Enable the MIDI input
In your DAW's preferences, go to MIDI or Controllers and enable "Mixlar M1X" as a MIDI input device.
10
Use MIDI Learn
Most DAWs support MIDI Learn — click a parameter in the DAW, then move a control on the Mix. The DAW automatically maps them together.
Compatibility
Works with your DAW
The Mixlar M1X is a class-compliant USB MIDI device. It works with any software that accepts MIDI input.
Ableton Live
FL Studio
Logic Pro
Pro Tools
Reaper
Cubase
Studio One
Bitwig Studio
GarageBand
Any MIDI software
Troubleshooting
Common issues
Make sure you've enabled MIDI mode in Mixlar Control. Try a different USB port or cable. Some USB hubs don't pass MIDI correctly — connect directly to your computer.
Verify that your DAW has the Mixlar M1X MIDI input enabled in its preferences. Use MIDI Learn to map controls. Check that the CC numbers in Mixlar Control match what your DAW expects.
Bluetooth adds a small amount of latency. For time-critical performance, use USB. Make sure your Bluetooth adapter supports BLE 5.0+ and that no other devices are causing interference.
Requirements
USB-C port
Windows 10+, macOS, or Linux
Mixlar Control app
Any DAW with MIDI input
Bluetooth 5.0+ (optional)
Internet for updates & plugins
Mixlar Mini
Plug in, flip the switch, and you're ready to go. No drivers, no software.
Step 1
Plug in and flip the switch
That's all it takes to get MIDI working.
1
Connect USB-C and flip to MIDI
With the Mixlar Mini plugged into your computer, flip the side switch to MIDI. The device reboots in a couple of seconds and your computer sees it as a MIDI controller immediately — no drivers needed.
Open your DAW and you should see "MixlarMini" in the MIDI input list. The sliders send CC 1-4 and the buttons send Notes 60-65 on Channel 1 by default. Move a slider or press a button to confirm it's working.
That's it for basic MIDI. If the defaults work for you, you're done. The steps below are only needed if you want to customise CC numbers, channels, or enable Bluetooth MIDI.
Step 2 (Optional)
Connect to the web portal
To customise your MIDI settings or enable BLE, you'll need to access the built-in web portal.
2
Join the hotspot
On your phone or laptop, connect to the WiFi network called MixlarMini_XXXX (the XXXX is unique to your device). A setup page will automatically pop up.
3
Choose your network
The setup page asks if you want to stay on the hotspot or connect to your home network. Connecting to your home network is the best option — it lets you access the portal from any device on your WiFi.
Select your home network, enter your WiFi password, and the device will restart and connect automatically.
4
Open the portal
Once connected to your home network, open http://mixlar-XXXX.local in any browser. The XXXX is the last 4 characters of your device's serial number — it's the same code shown in the hotspot name, and it's unique to your device so multiple Mixlar Minis can be on the same network without conflicts.
Staying on hotspot? That works too — the portal opens automatically when you connect. You just won't be able to access it from other devices on your main network.
One device at a time. For the best experience, only have one phone or computer connected to the web portal at a time. The Mixlar Mini has a lightweight web server — multiple browsers hitting it at once can make it unresponsive.
Step 3 (Optional)
Customise your MIDI settings
Change CC numbers, channels, button behavior, and more from the web portal.
5
Edit sliders and macros
Tap any slider label or macro button in the portal to edit it. You can change:
- CC / Note number and MIDI channel for each control
- Note or CC mode for buttons (Note sends note on/off, CC sends value 127/0)
- Momentary or Toggle behavior for buttons
- Velocity for each button
- Linear or Logarithmic slider curve
- Custom labels for everything
6
Create profiles
You can save up to 4 profiles with different MIDI mappings and switch between them from the portal. Great if you use different settings for different DAWs or projects.
Step 4 (Optional)
Enable Bluetooth MIDI
Go wireless. Once enabled, the setting saves and persists across reboots.
7
Turn it on
In the web portal, tap the gear icon to open settings. Switch BLE MIDI to On. That's it — the device starts advertising as a Bluetooth MIDI controller. The setting is saved so it stays on even after you unplug or restart.
8
Pair on your computer
Mac: Open Audio MIDI Setup, go to MIDI Studio, click the Bluetooth icon, and connect to "MixlarMini_XXXX". It shows up as a MIDI input automatically.
Windows: Pair with "MixlarMini_XXXX" in Bluetooth settings, then use a tool like loopMIDI + MIDIberry to route BLE MIDI into your DAW.
USB is still needed for power. BLE MIDI sends the data wirelessly, but the device still needs to be plugged in via USB-C for power.
Compatibility
Works with your DAW
Class-compliant USB MIDI — works with anything that accepts MIDI input.
Ableton Live
FL Studio
Logic Pro
Pro Tools
Reaper
Cubase
Studio One
Bitwig Studio
GarageBand
Any MIDI software
Troubleshooting
Common issues
Make sure the switch is on MIDI, not COM. Try a different USB port or cable — some USB hubs don't pass MIDI properly, so plug directly into your computer.
Some devices don't auto-open the captive portal. Open a browser and go to http://192.168.4.1 manually.
Make sure your computer and the Mixlar Mini are on the same WiFi network. The .local address uses mDNS — it works on most systems but if it doesn't resolve, check your router's admin page for the device's IP address and use that instead.
Bluetooth always adds a bit of latency compared to USB. For time-critical work, use USB. If it's unusually bad, check that your Bluetooth adapter supports BLE 5.0+ and reduce interference from other wireless devices.
Try forgetting the device from your WiFi saved networks and reconnecting fresh. On the hotspot, forget MixlarMini_XXXX from your WiFi settings, then rejoin it. On your home network, clear your browser cache or try an incognito window. Sometimes a stale connection or cached page is all it takes to cause issues.