A walkthrough of sliders, macros, and profiles in Mixlar Control.
1
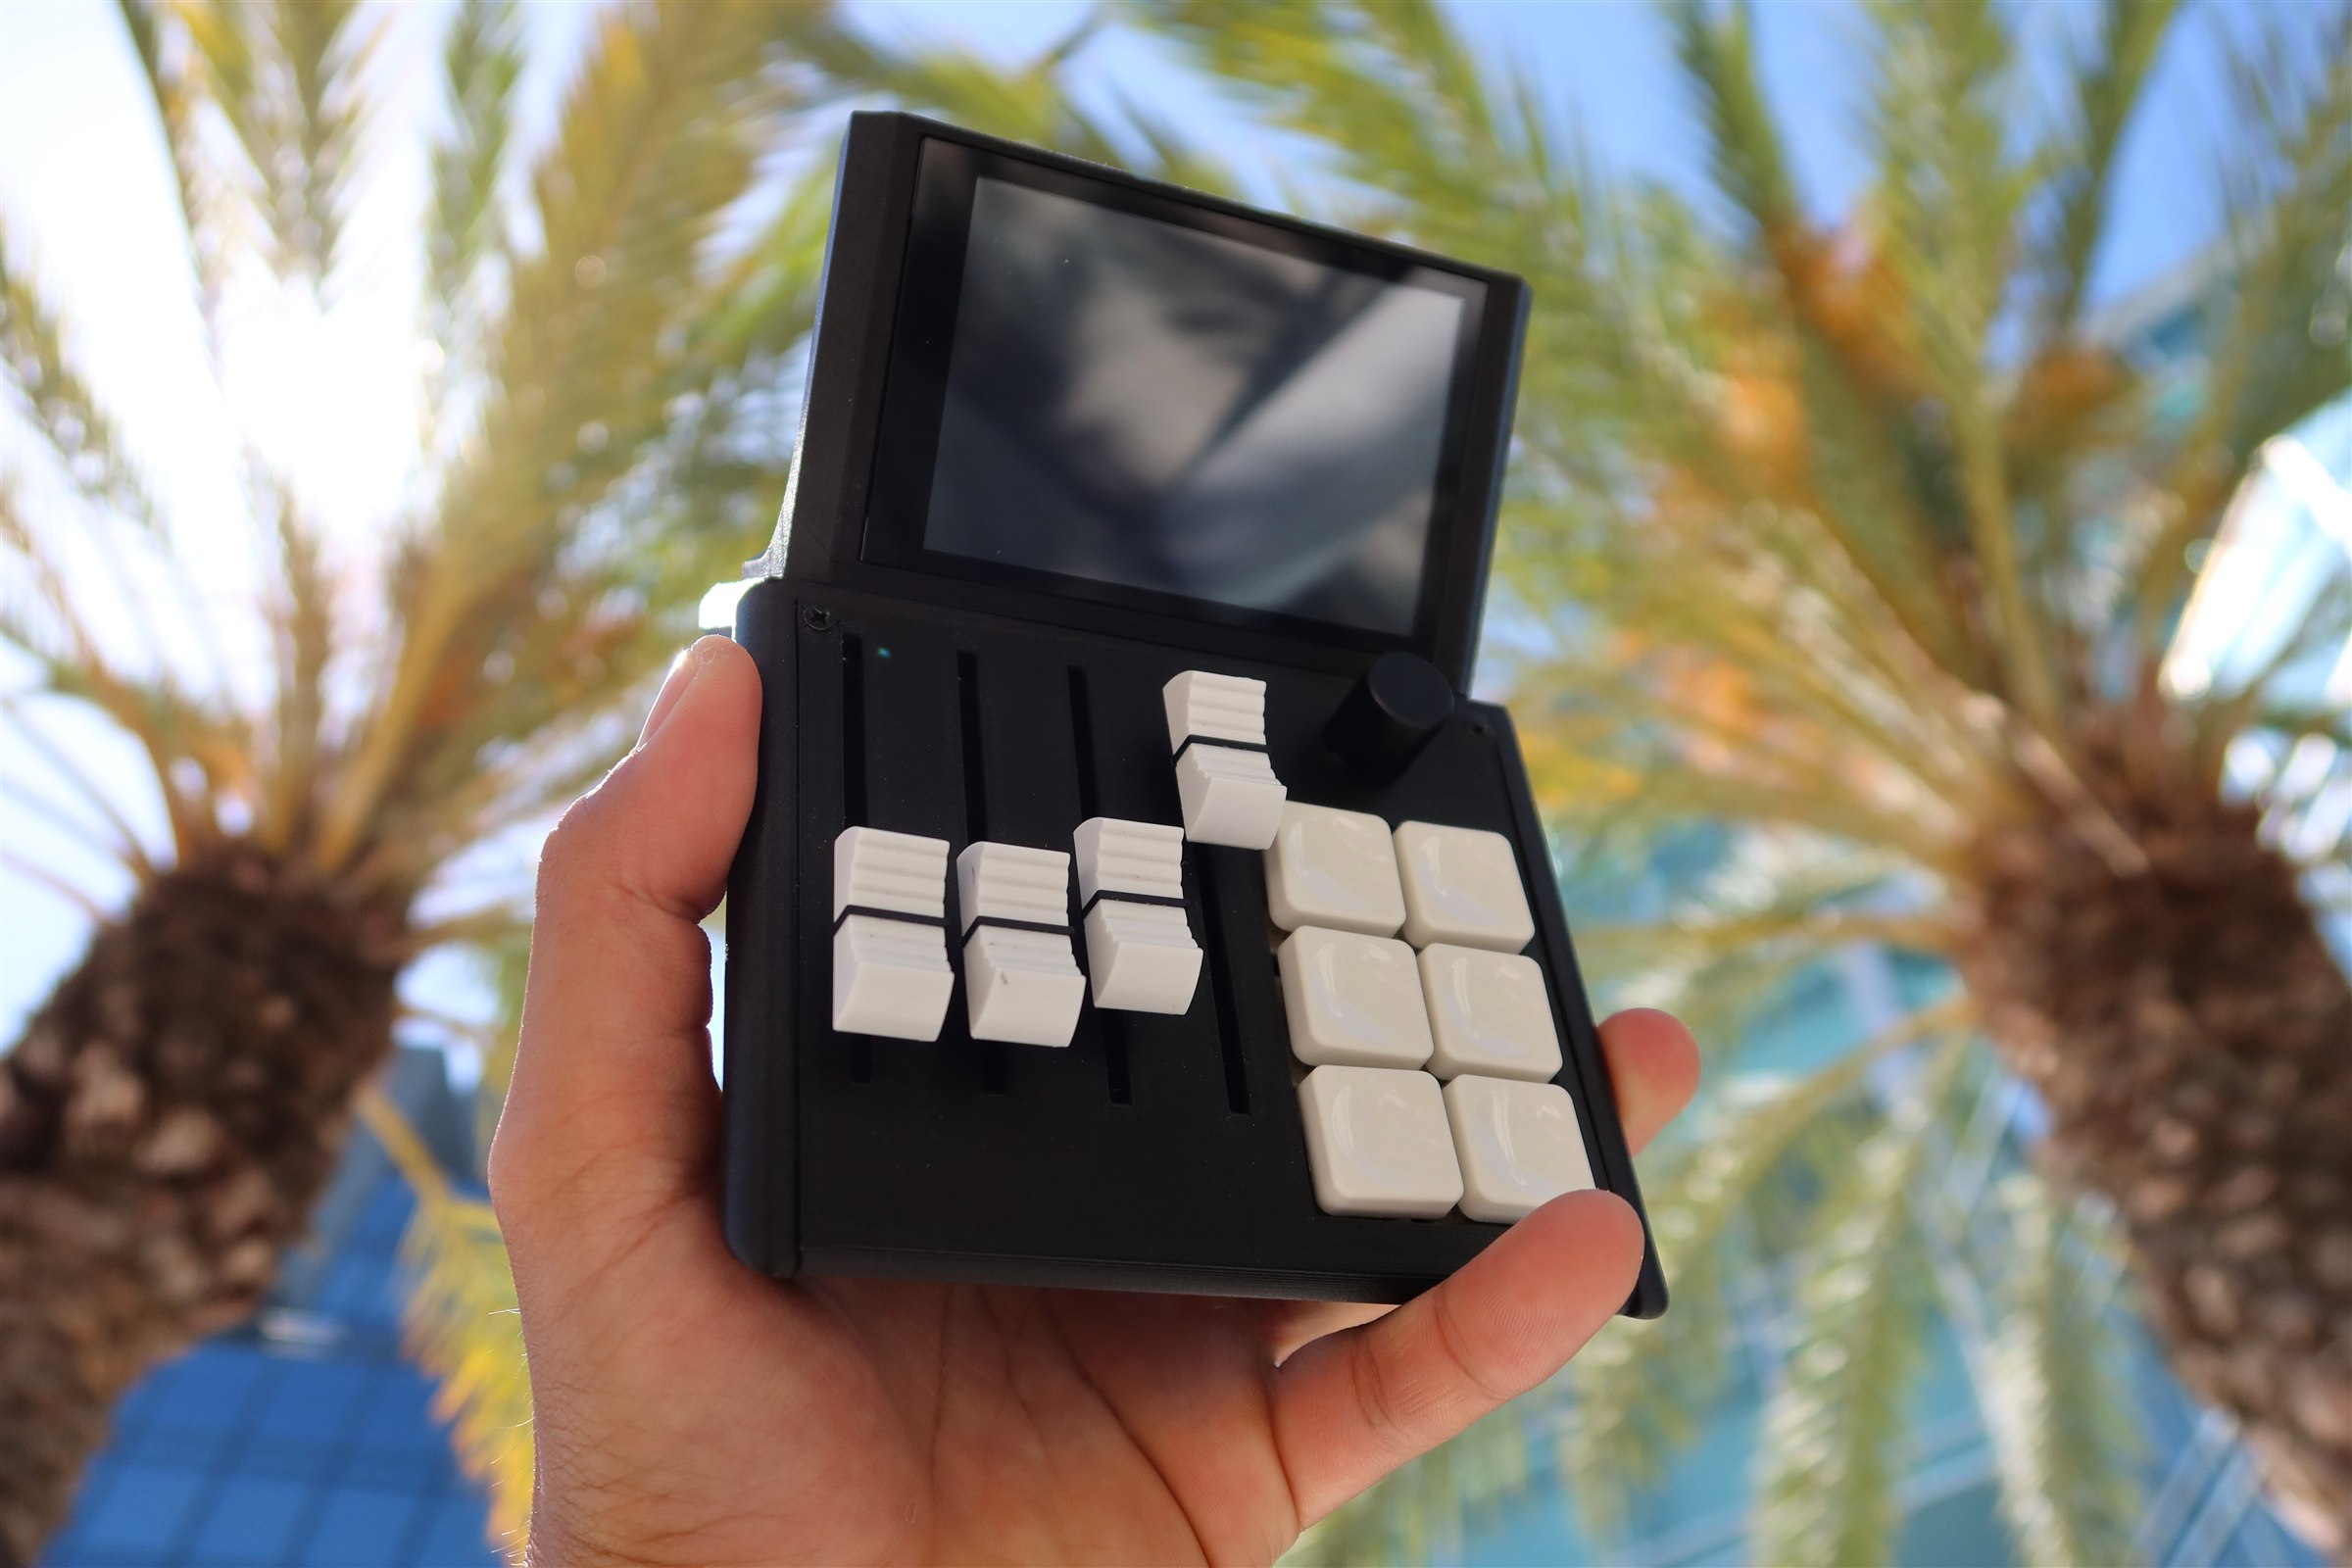
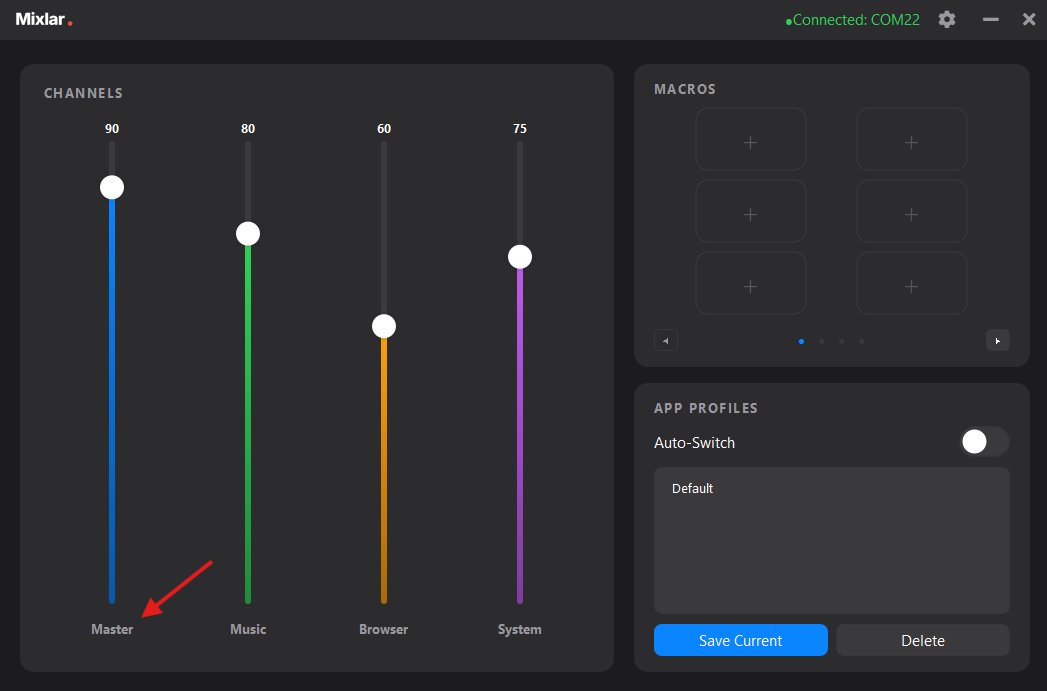
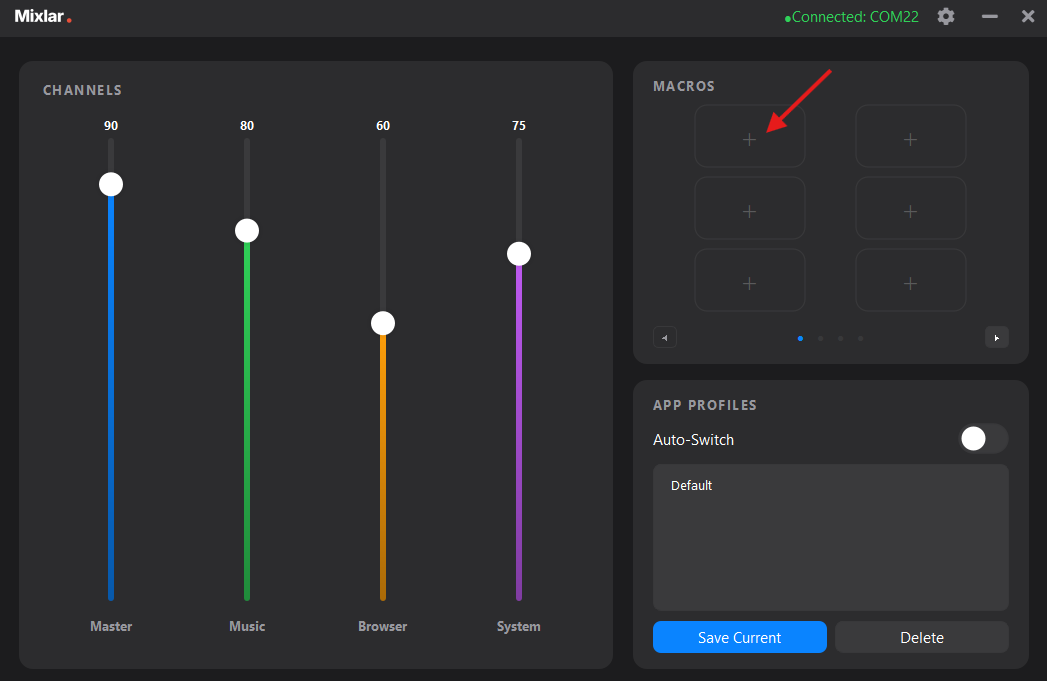
The main screen
This is your home screen. On the left are your 4 sliders (Channels), on the top-right are your 6 macro buttons, and on the bottom-right are your App Profiles. Click a slider label to configure it.
2
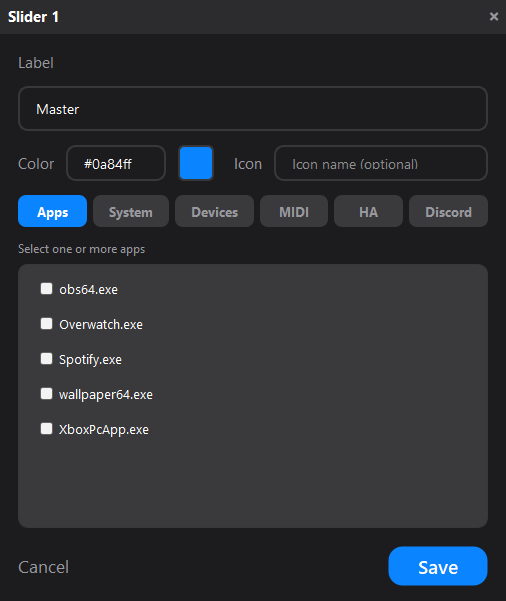
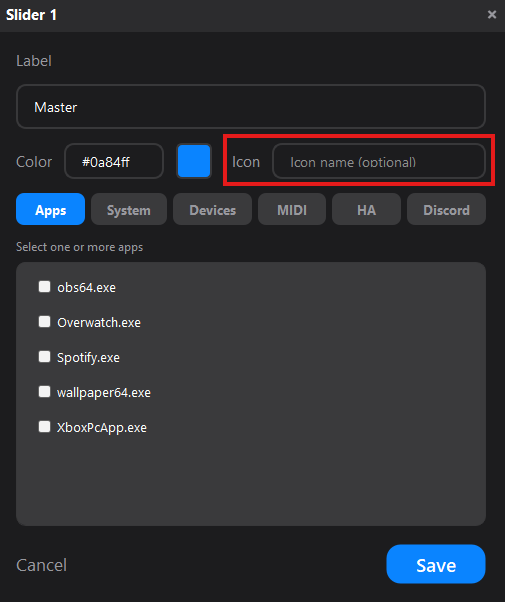
Configure a slider — Apps
Click a slider label to open its settings. Under the Apps tab, select one or more apps to control their audio volume individually.
3
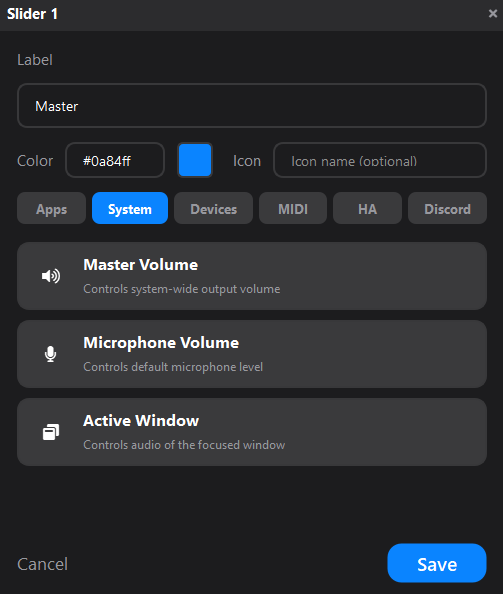
Configure a slider — System
The System tab lets you control system-wide audio: Master Volume, Microphone Volume, or the Active Window.
4
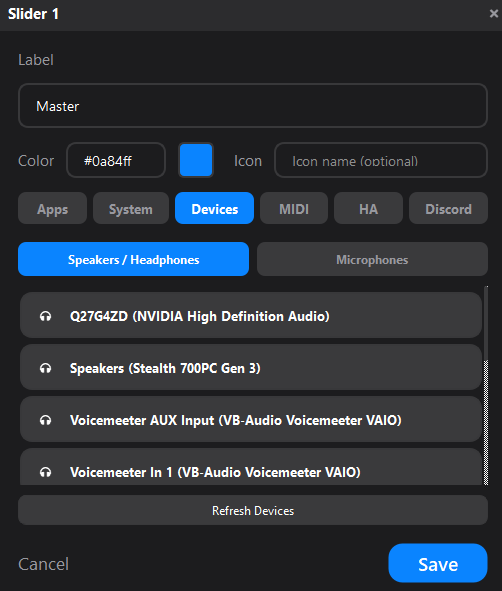
Configure a slider — Devices
The Devices tab shows your speakers, headphones, and microphones. Pick a specific audio device to control its volume directly.
5
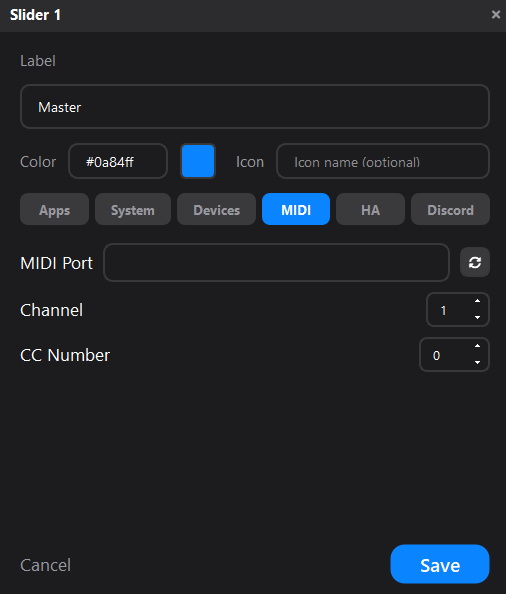
Configure a slider — MIDI
The MIDI tab lets you send MIDI CC messages to a DAW or other software. Set the port, channel, and CC number.
6
Customize color and icon
Each slider has a Color (hex code) and optional Icon that show on your device's display. Change them to match your setup.
7
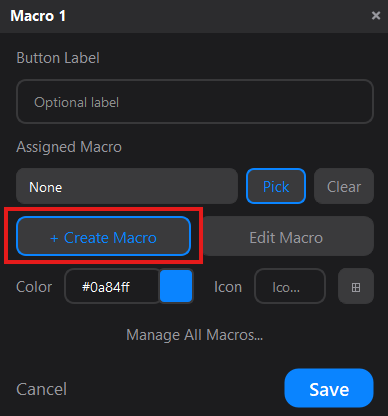
Add a macro
Click any + button in the Macros section to add a new macro. You have 4 pages of 6 macros each (24 total).
8
Create a macro
In the macro dialog, click + Create Macro to open the Macro Editor. You can also pick an existing macro with Pick.
9
The Macro Editor
Build macros from 13 action types: Keyboard shortcuts, Type Text, Open App, Open URL, Command, API Call, Mouse Click, Delay, Media Key, Smart Home, Discord, OBS Studio, and Spotify. Chain multiple steps into one macro.
10
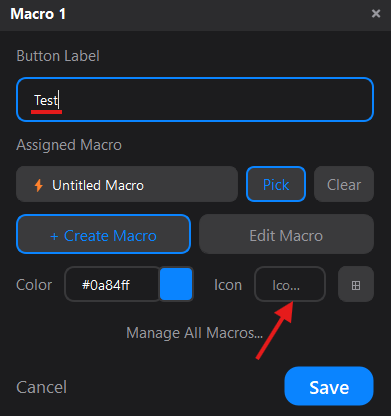
Label and save your macro
Give your macro a Button Label, customize the Icon and Color, then click Save. The macro will appear on your device instantly.
11
App Profiles
Profiles save your entire slider and macro layout. Enable Auto-Switch to automatically change profiles when you focus a specific app (e.g. switch to a "Gaming" profile when you open a game).
12
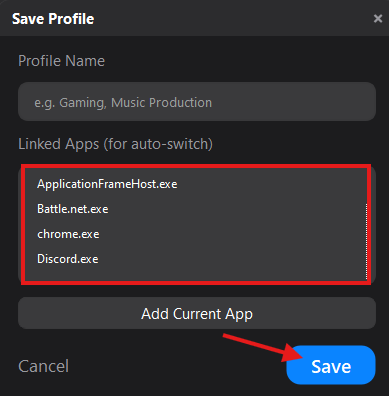
Save a profile
Click Save Current to save your layout as a profile. Give it a name and link apps for auto-switching. Click Save when done.
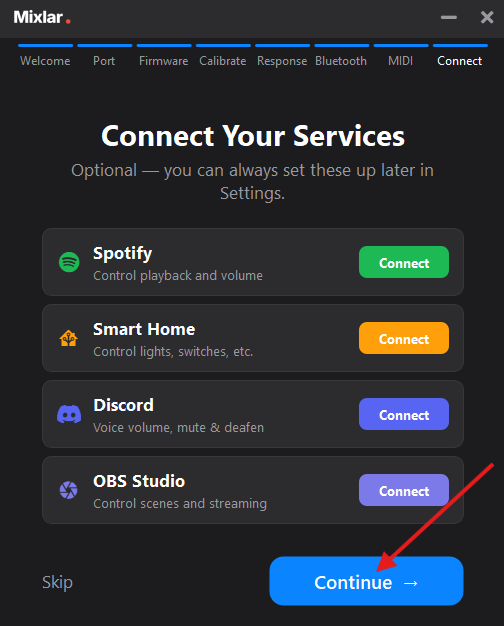
Want to connect services? Visit our integration guides to set up Spotify, OBS, Home Assistant, and Discord.
Connect your services
Link Mixlar Control to Spotify, OBS Studio, Home Assistant, and Discord for even more control.
Guides for knobs, cables, mounts, and other add-ons.
1
Custom knobs
Swap out your stock knobs for custom ones. Gently pull the existing knob straight up to remove it, then press the new one onto the shaft until it clicks into place.
2
USB-C cables
Any USB-C data cable will work with your Mixlar. For the best experience, use a cable that supports USB 2.0 or higher. Charge-only cables will not work.
3
Mounting kit
The desk mount attaches to the bottom of your device with the included screws. Secure it to your desk using the clamp or adhesive pad — both are included in the kit.
4
Need help?
If you have questions about an accessory, reach out to us at support@mixlar.net or visit our support page.